Via the use of MQTT, this guide will walk Zendir Users through the steps required to create a Simulation that has its tick controlled via a remote source. This guide also assumes a basic knowledge of the Message Queuing Telemetry Transport (MQTT) protocol.
Configuring the Simulation
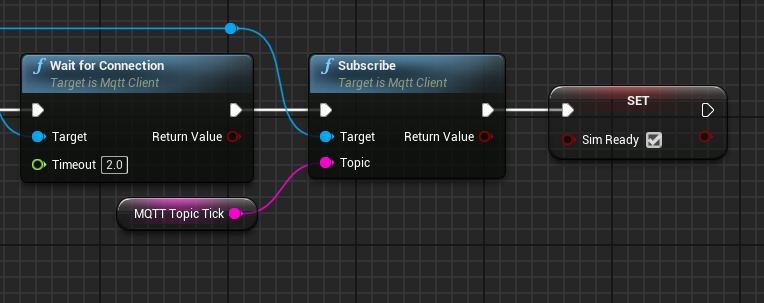
During the Event Begin Play of the simulation level, an MQTT Client needs to be created and connected.

NOTE
The
Connectfunction of the MQTT client will need to be updated for the selected external broker if used. The following broker is a free and public broker that can be used for testing purposes.
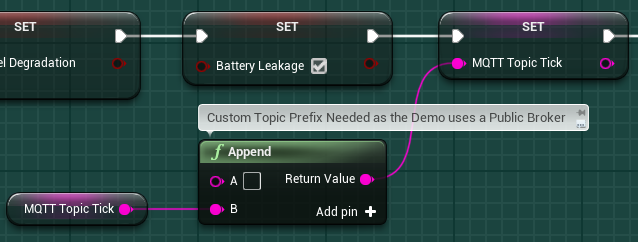
Once the Client is connected, it must Subscribe to the Tick Topic. As the Demo is using a public broker, users are advised to add a Topic Prefix to prevent others from controlling the tick of your simulations.
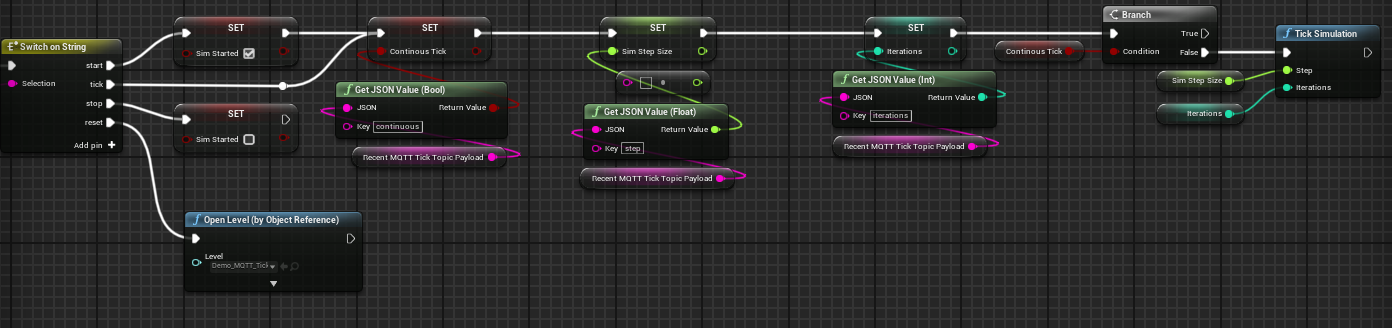
Ticking the Simulation
The simulation level will only start processing Tick commands once the simulation has been initialized. When a new Tick command has been received, the simulation will need to extract the command type, the the below example the MQTT Message Payload is JSON-formatted.

An example of the MQTT message payload is shown below, where the command is to start ticking the simulation continuously with a step size of 0.1 and 10 iterations/steps per Unreal frame.
data = {
	"command": "start",
	"continuous": True,
	"step": 0.1,
	"iterations": 10
}
Based on the received command, the simulation would then extract the rest of the information in the MQTT JSON Payload and action the command. These actions could include starting, stopping, ticking and resetting the simulation.