As we build simulations, we need to ensure they are acting as we expect them to. This operator guide will explain how to create a System Test using the Unreal Editor’s automation tool and Zendirs’ provided tools. System tests will run through the level and assert that the two values are equal. This will all be built upon the provided Demo_CameraPayloads and assert that the Pointing Error is zero after 360 seconds.
Creating a Functional Test
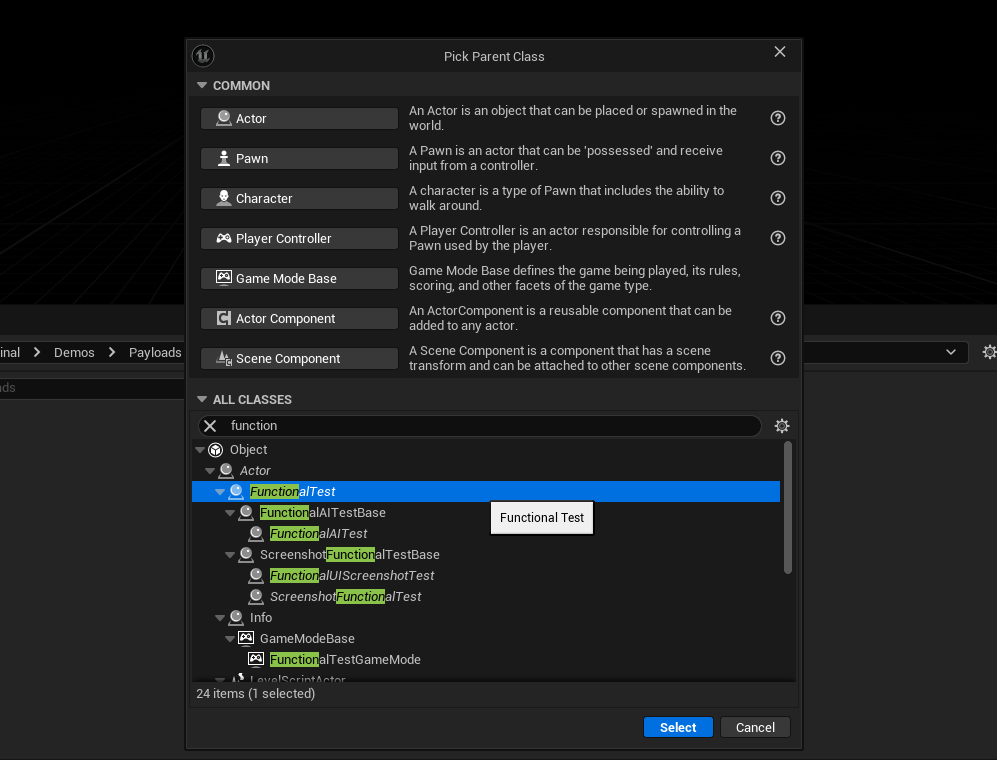
A functional test is how Unreal Engine is able to find all the tests in the levels and run them automatically. To create one, create a new blueprint and have the parent be of a FunctionalTest type.
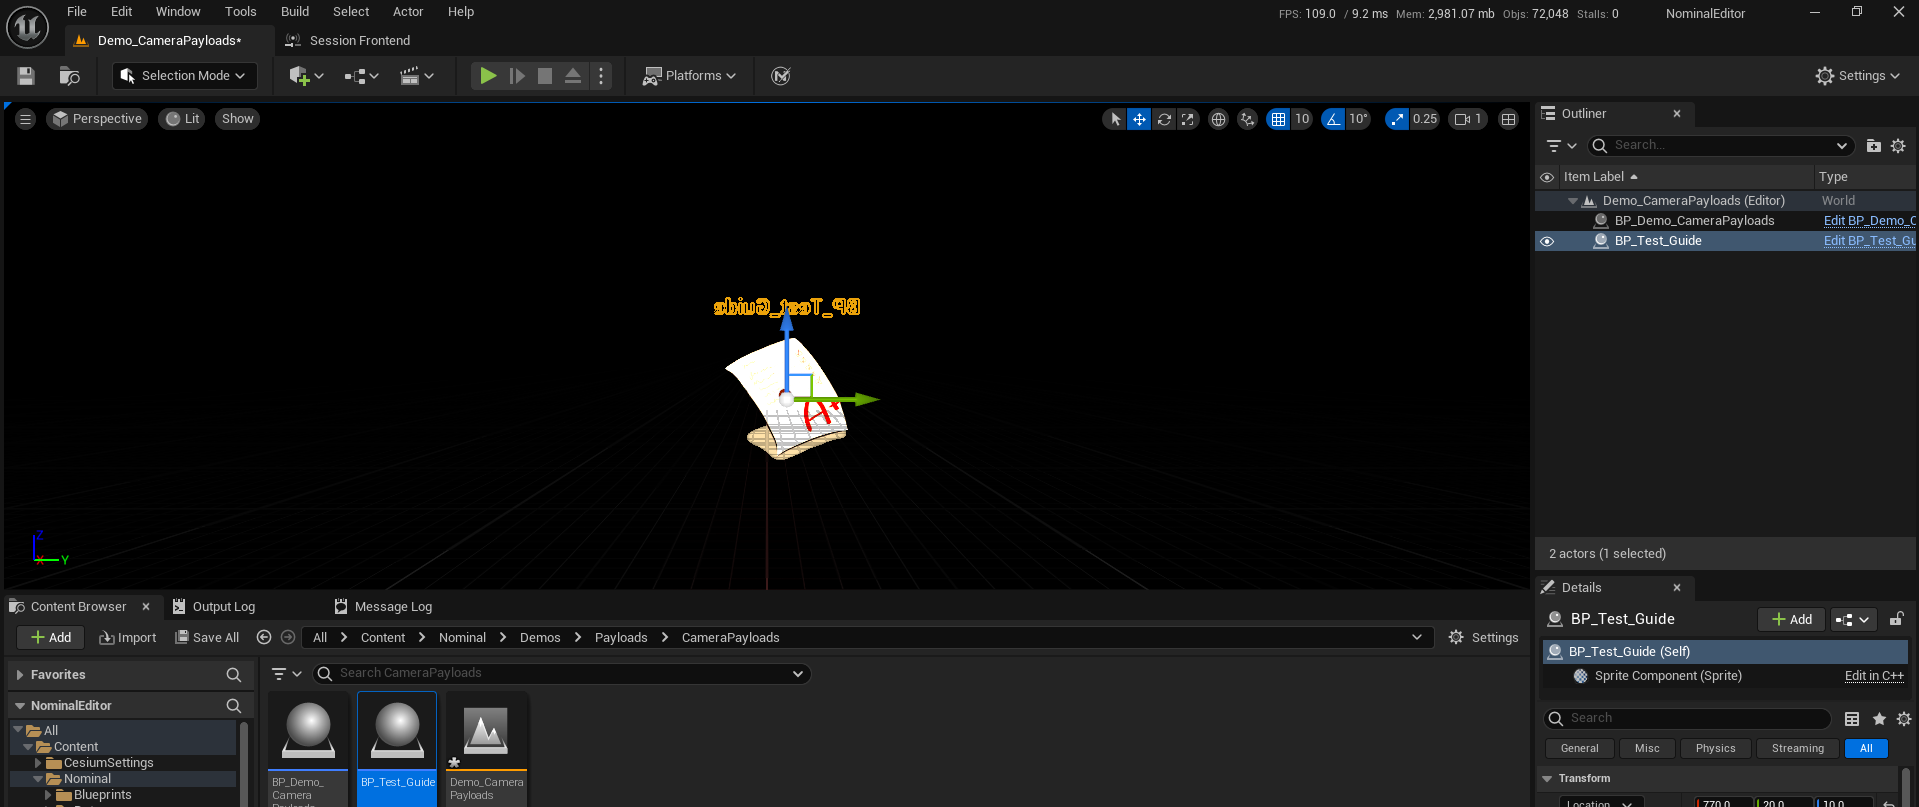
Add the blueprint to the level by dragging and dropping the blueprint from the content folder into the viewport.
Creating an Assert
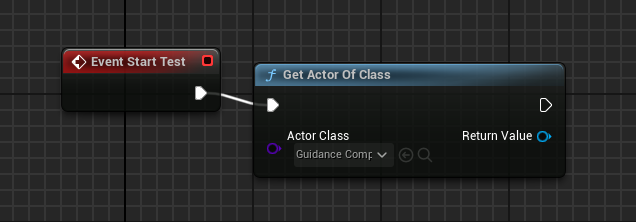
Open the functional test blueprint and go to the event graph. We need to store a reference to the value we want to assert. In this guide, we will assert Pointing Error is zero which is stored on the Guidance Computer. From the Event Start Test, call Get Actors Of Class and have the base Guidance Computer as the Type. This will grab any actors inheriting from Guidance Computers.
From there, get the Out Attitude Error Msg from the Guidance Computer and store it as a variable.

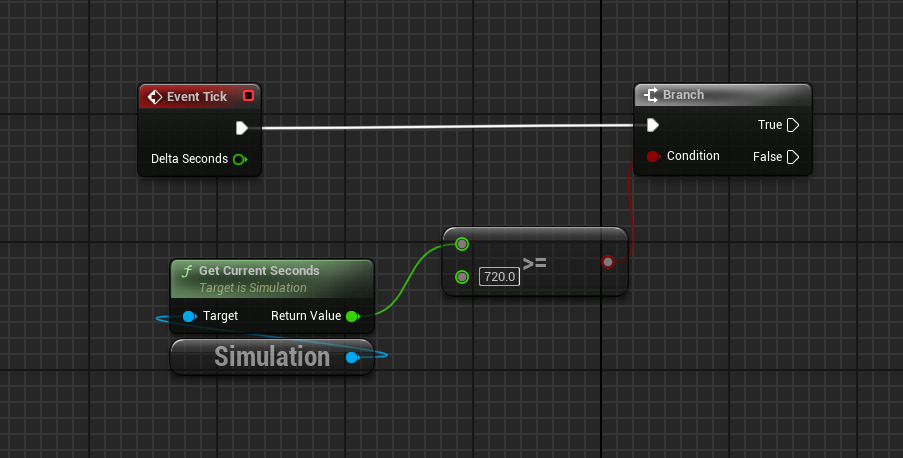
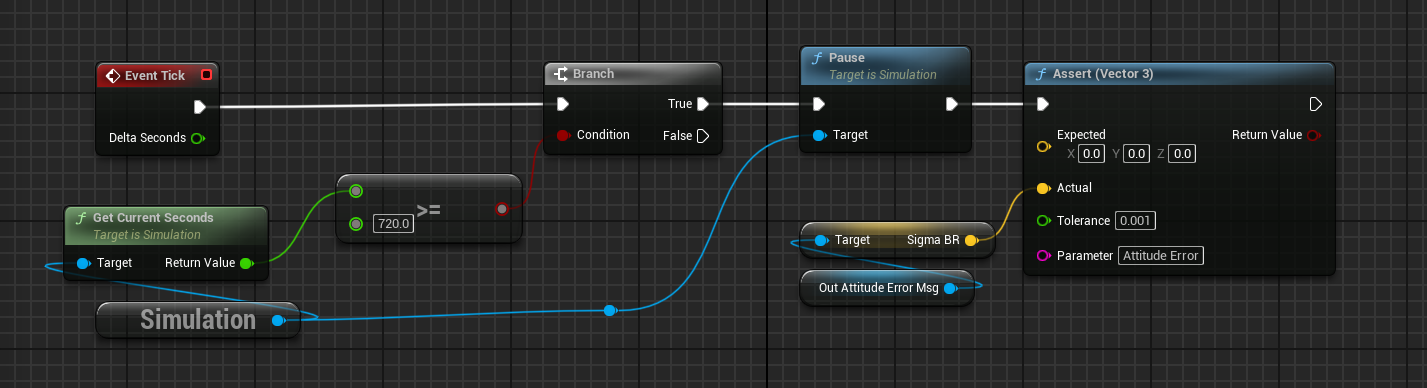
From the Event Tick, get the Simulation’s Current Seconds and input it into a >= node with 720 and finally the bool into a Branch. This is to stop the simulation at 720 seconds and do the assert then.
On the True pin on the Branch node, call the Pause function from the Simulation to pause the simulation and stop it ticking when the simulation has passed 720 seconds. Then call Assert (Vector 3) or Assert (Vector). The difference between the two is the first one is created from Zendir while the other is from Unreal otherwise they function similarly. Get Sigma BR from the Out Attitude Error Msg variable and pass that into the Actual parameter in the assert. Set the tolerance to 0.001 as the attitude error will never hit 0. Also, put “Attitude Error” as the Parameter to track the name.
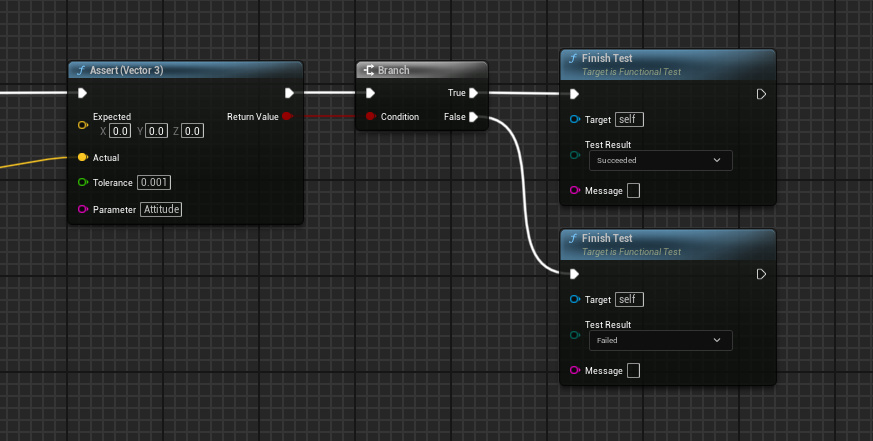
From the Assert’s return value, create a Branch node. Create a Finish Test node on both the True and False pins. Set the Test Result to Succeded for the True path and Failed for the False path. This will end the tests and record the results on the Automation Tool.
Running the Test
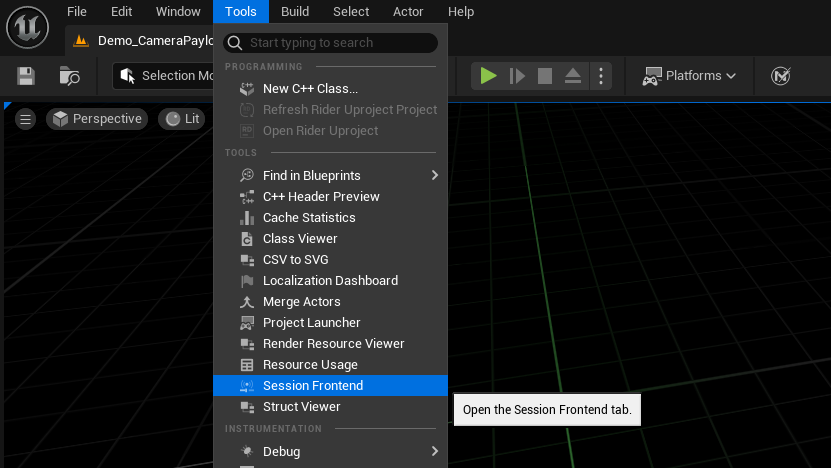
Open the Session Frontend window found in Tools → Session Frontend. Depending on your computer’s operating speed this can take a minute to load.
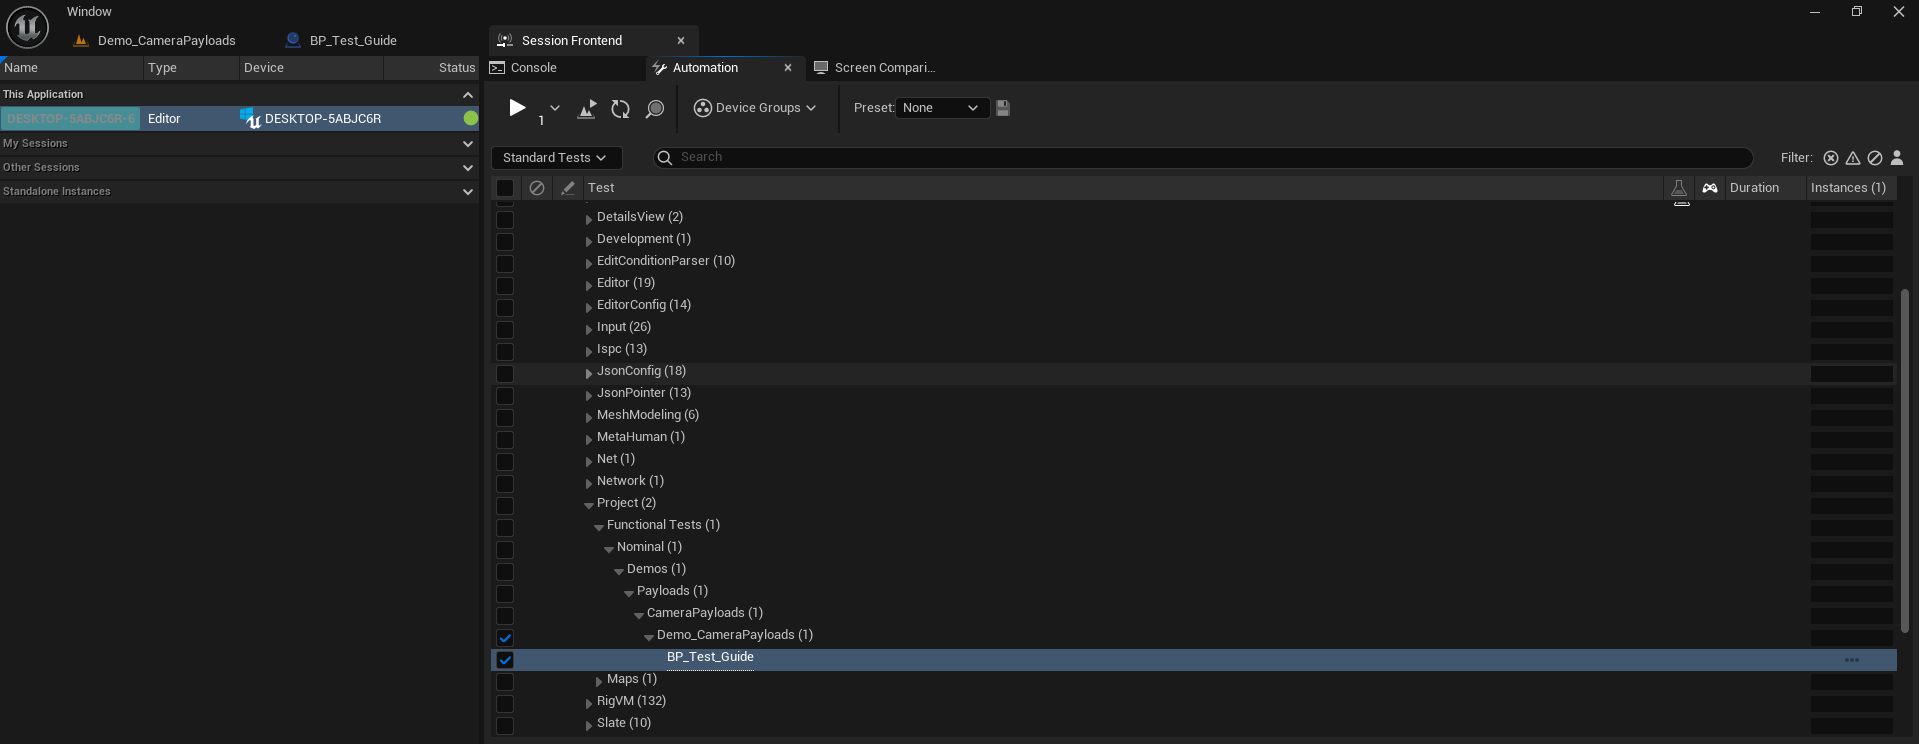
Select the Automation tab in the Session Frontend window. From here you should see the functional test actor you’ve placed in the level under Project → Functional Test → MapPath → Functional Test Actor.
NOTE
If the level can’t be found in the tab, make sure to save the level and click Refresh Tests in the automation tab.
Click the checkbox to the left of it and click Start Test. If there were any errors during the test, it will list them in the Automation Test Results section at the bottom.
The test will run exactly as if you hit play on the level but with the functional test actor also running. Functional test actors will only run when you run them through the automation tool. After the test is completed, it will return a pass or fail. If you had multiple tests selected, they will run one after the other and their results will be shown here.
NOTE
A group of tests can be made into a preset which can be run as a group.
Lastly, the results can be exported in a CSV format. This can be done by selecting the test levels in the test section once they have completed running and by clicking on the Export button.
