The Timeline
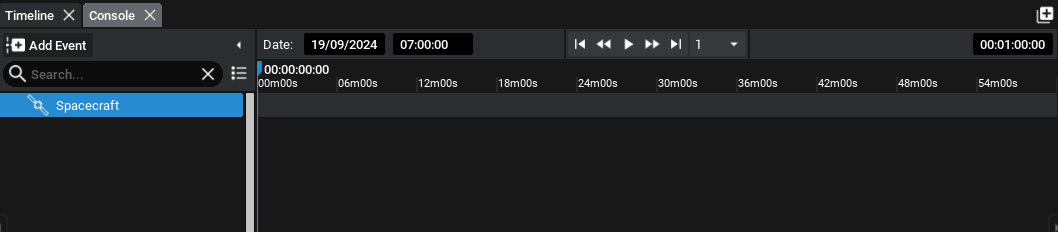
The Timeline Panel, located under the viewport, contains a summary of all events that will or have happened throughout the simulation. Some events are automatic, such as eclipse and altitude warnings. Others can be specified through the Events System, including timers that will always appear in the timeline, and flags that have markers that appear when they are triggered. The timeline can be panned and zoomed and provides an easy place to specify the epoch and simulation speed.
Configuring Events
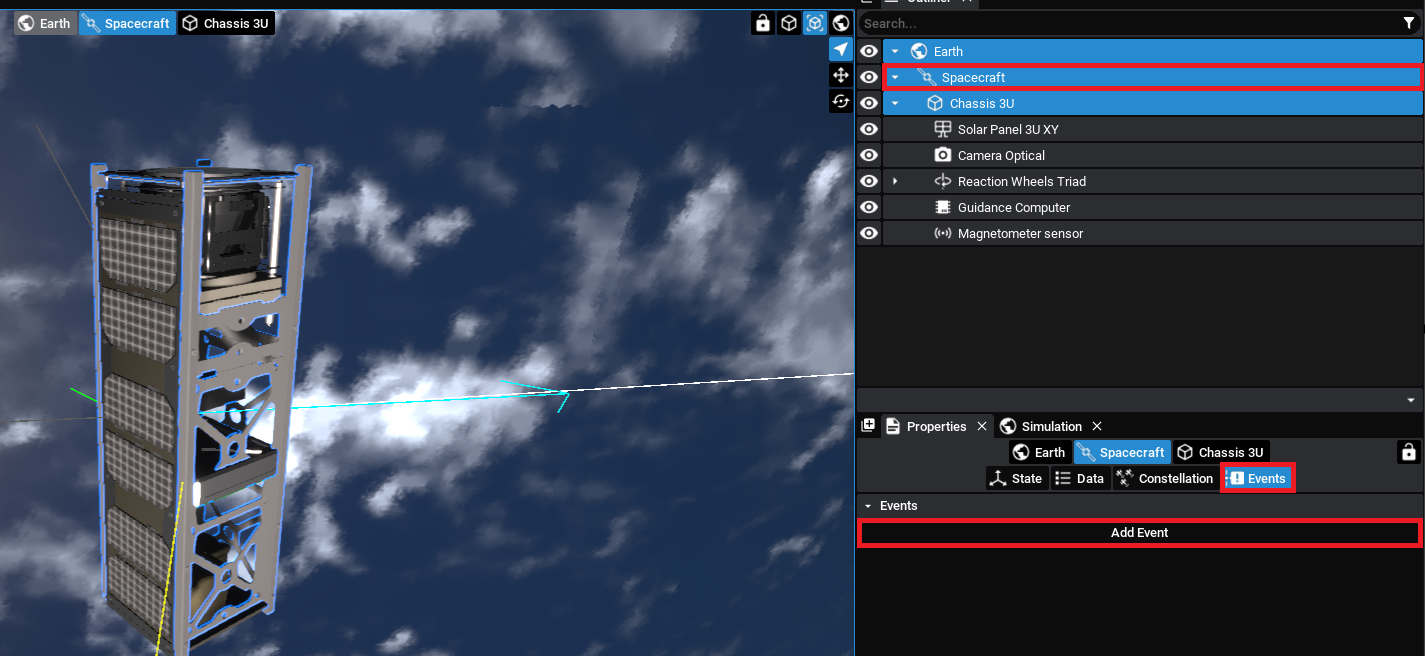
Currently, the spacecraft can orbit the Earth but does not have any functionality. To add some events to the spacecraft, select the spacecraft and open the Events tab in the Properties Panel. Click Add Event to register a new event on this spacecraft.
The first event that will be triggered will be an event to begin pointing the camera towards the Earth. This will be a timer event and the time that it should occur at can be set in seconds. The event will occur on the Guidance Computer and the action will Start Nadir Pointing, which will point the camera towards the Earth.

NOTE
Each event can have multiple triggers and actions. A trigger is a reason for the event action to execute. A trigger can be a parameter watch, a timer or a MQTT message. An action is what occurs when the event is triggered. Any target component that is part of the spacecraft can be selected.
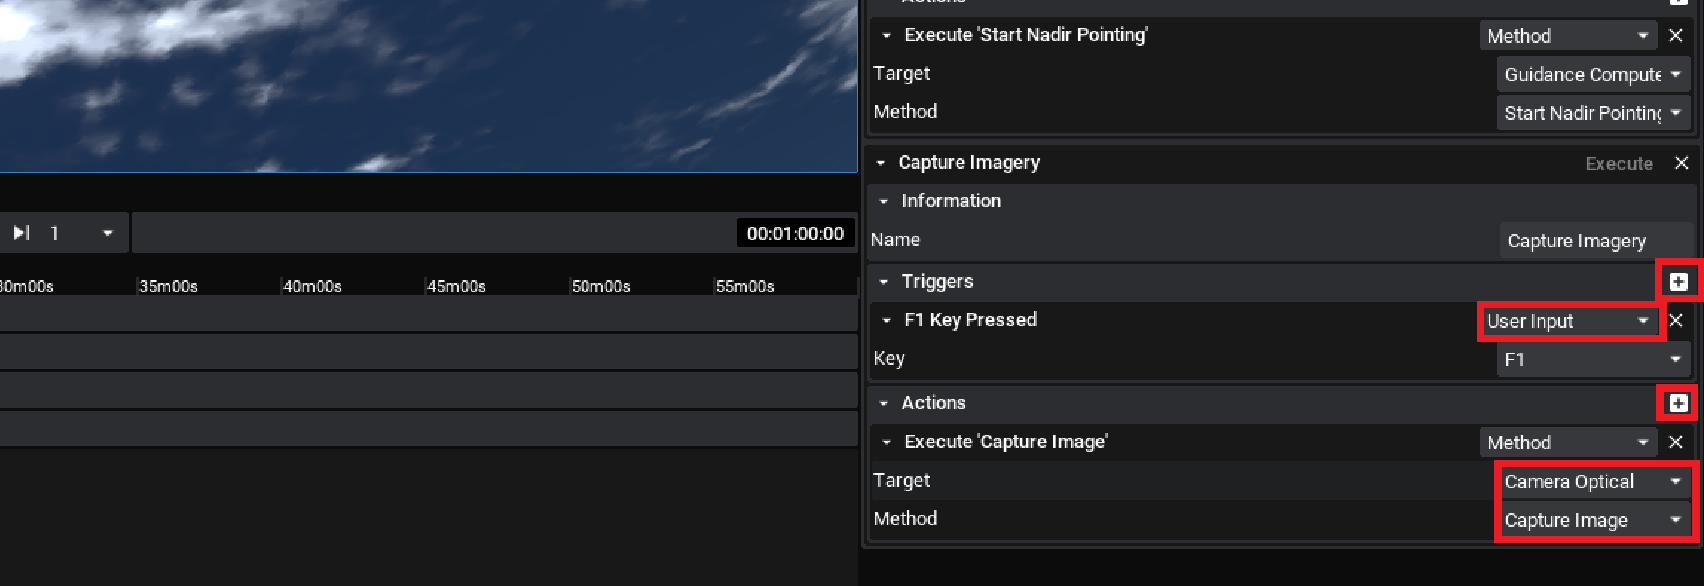
Another event that can be created is the user input event. This can be triggered when a button key is pressed. For this event, the camera will take an image and display it on a new window. This can be configured using the following parameters:
NOTE
The name of each event can be configured and this will be displayed on the timeline under the spacecraft selected. This is adjusted under the ‘Name’ property.
Events cannot be edited during the simulation time and must be configured when the simulation is in an ‘Editing’ state. The first event will be triggered when the simulation time exceeds 50 seconds for the first time. When simulating, by pressing this key on the keyboard (F1), the event will be triggered and an image will be taken from the camera.

NOTE
The events are marked on the timeline each time a trigger is executed. A green diamond is a timer trigger and a yellow diamond is a user input trigger. By moving the mouse over the diamond on the timeline, information about the trigger and event will be shown on the screen.