Creating an Asset
Previously, spacecraft have been created in the level using the standard base empty class or one of the default-created ones. This tutorial will cover how to create a new satellite design, with components attached. For this tutorial, a 2U frame will be used. Right-click on the content browser and select Blueprint Class. Click the dropdown of ‘All Classes’ and search for the spacecraft design to use as a base.
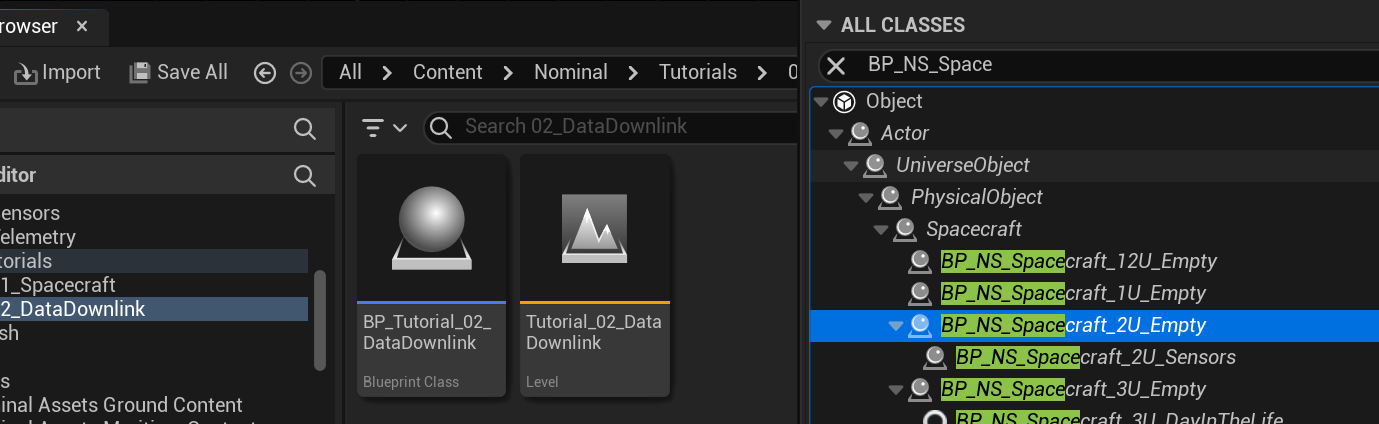
NOTE
The
BP_NS_Spacecraft_Empty_XUdesigns are standard **X-**unit cube satellites that have already been configured with a chassis. Additional components can be added to the child classes. When starting from scratch and wanting to create a new spacecraft, theSpacecraftbase class should be used.
The name of the spacecraft will be BP_Tutorial_02_Spacecraft. Additionally, it is good practice to put the spacecraft and the demo in the same folder within the content directory.
Navigating the Editor
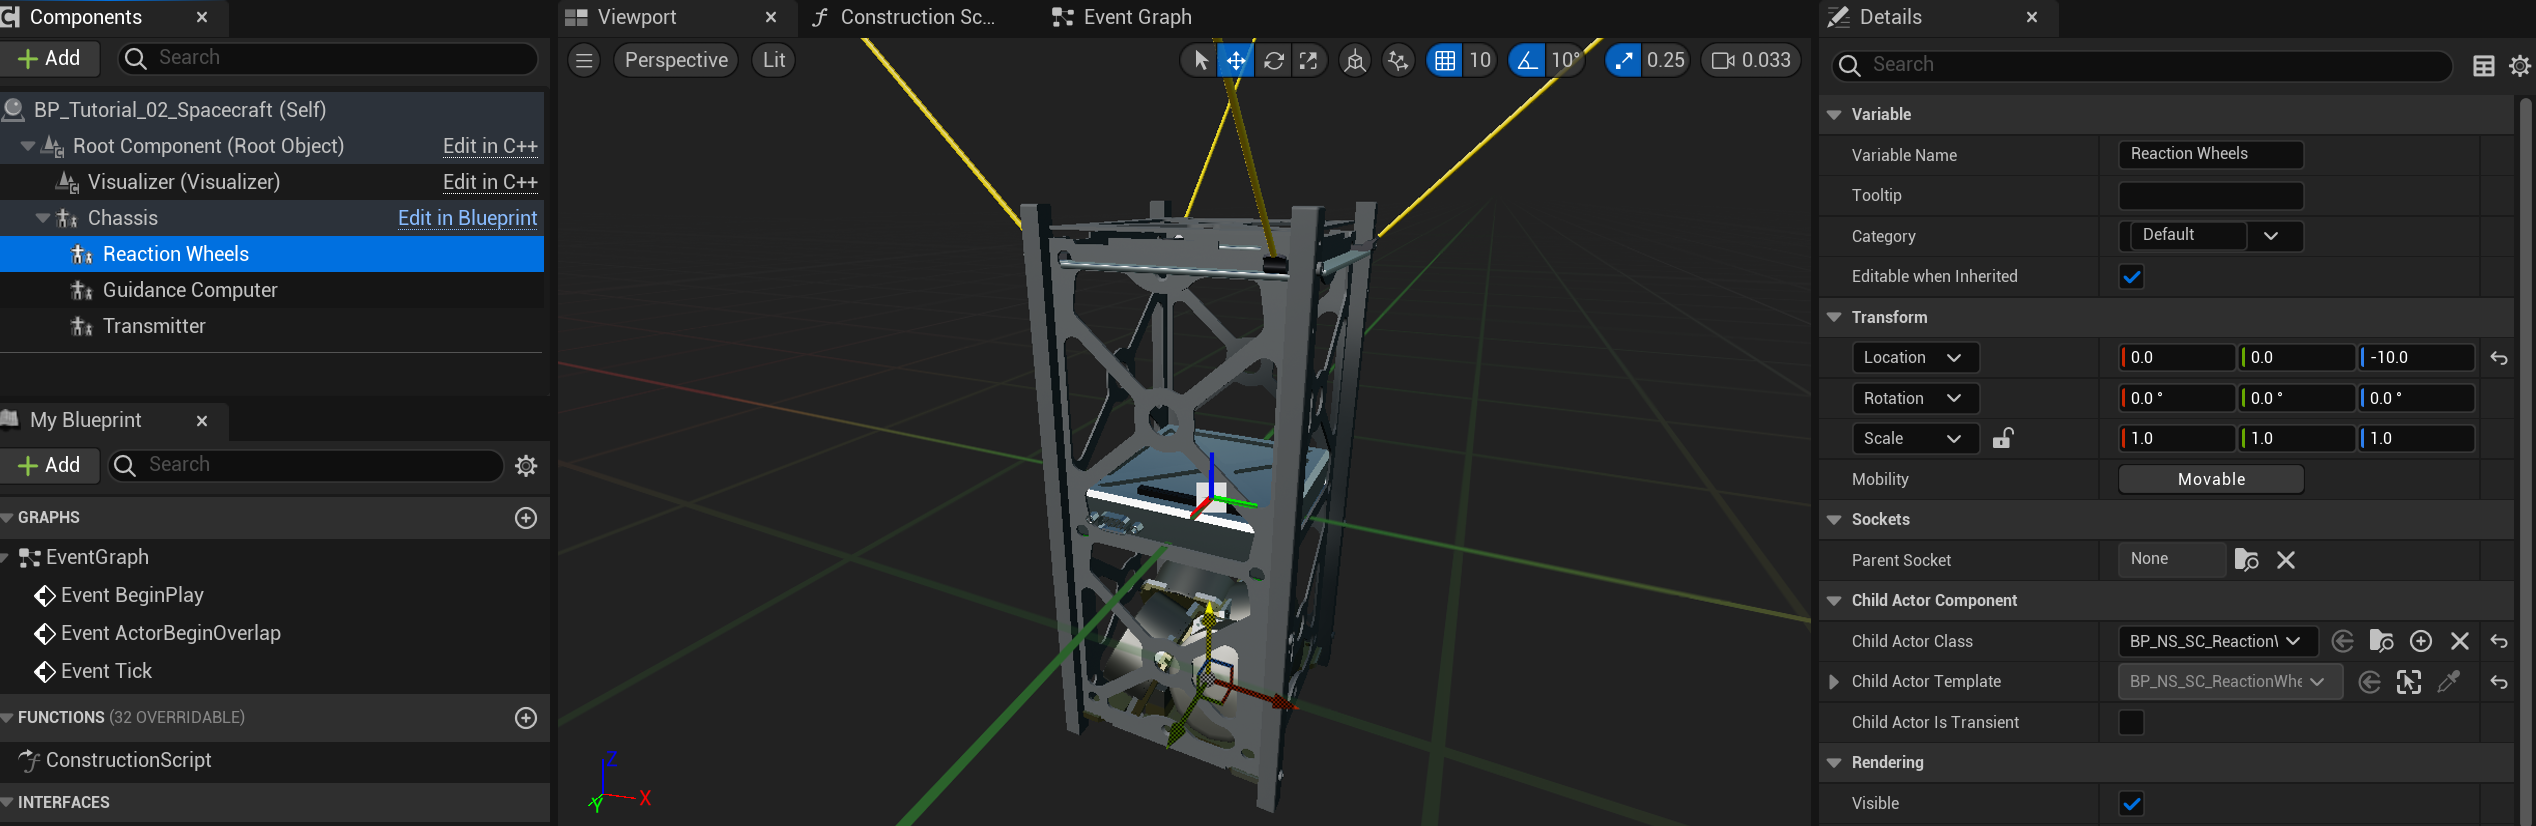
Opening up the spacecraft design (by double-clicking on the asset in the content browser) will show a new blueprint editor. This editor has many panels that are used for designing components in Unreal. There are five main panels in the blueprint editor:
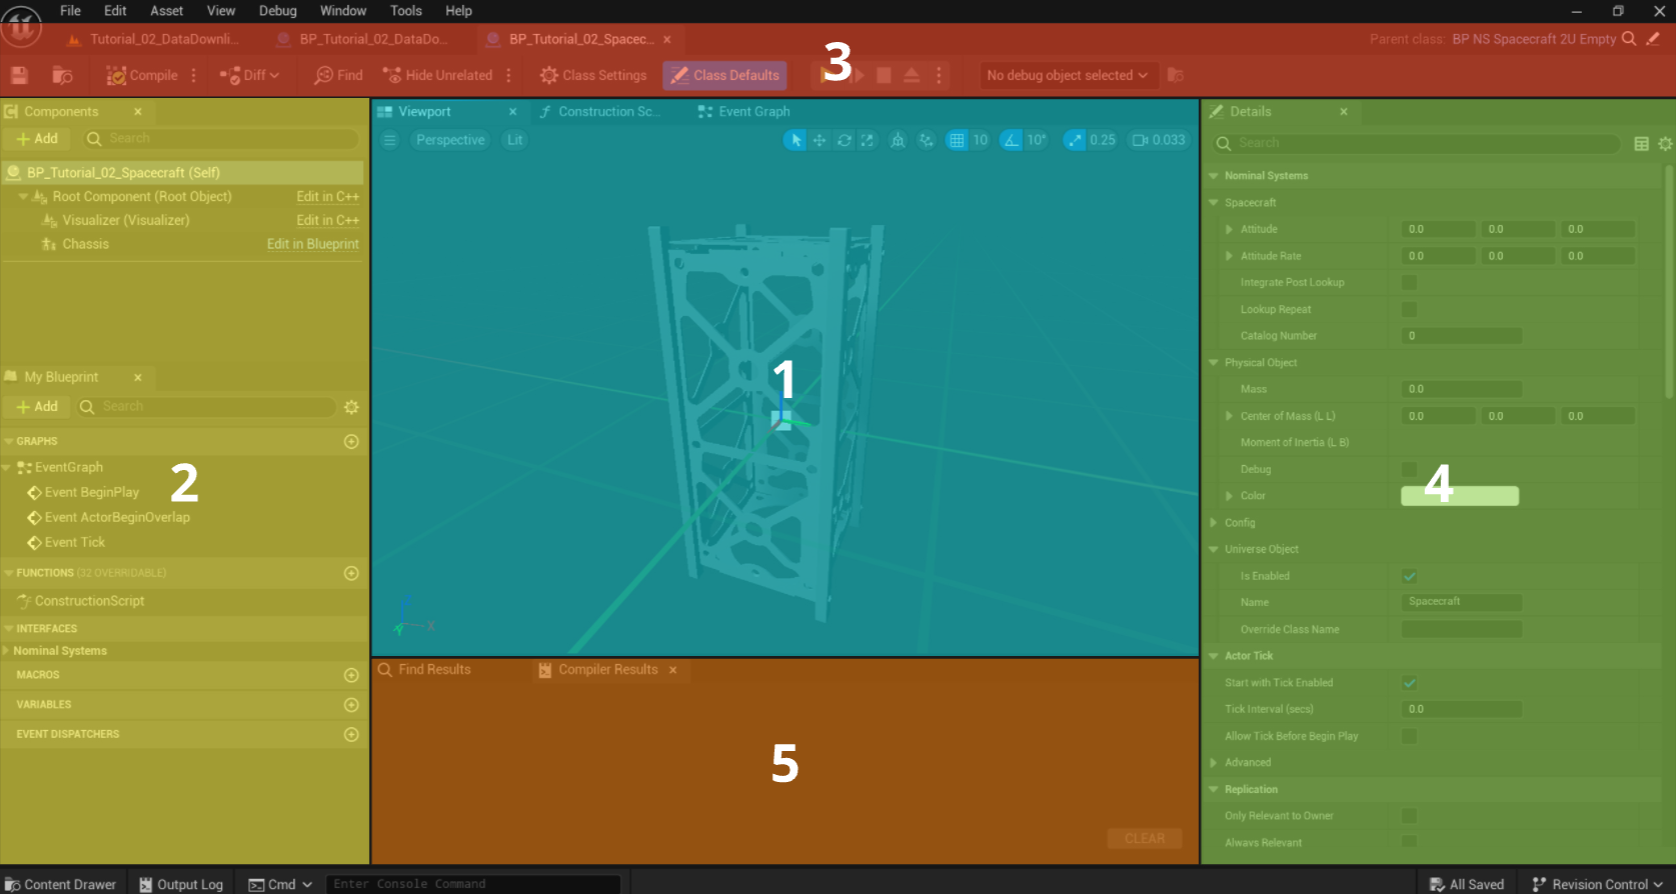
1. This is the viewport. Here, spacecraft or component designs will be shown with all components added to the spacecraft. Right-clicking this window and using the mouse and WASD keys will allow the user to move around the spacecraft and the view.
2. This is the outliner. Here, all functions, event graphs and variables that are exposed on the spacecraft are shown. Blueprints also have BeginPlay and Tick events that can be executed by the simulation. Blueprint code can be written here just as it can be in the level blueprint.
NOTE
Typically, the demos have all spacecraft code written in the level blueprint. This is not a requirement but rather a standard to have all code in the same place. It is just as valid to write blueprint code related to the spacecraft and its components in the component blueprint instead.
3. This is the toolbar. Several functions appear here, with the most common being the save and the compile buttons. The compile button will turn all the blueprint code into source code and update any variables or functions changed.
4. This is the details panel. All intrinsic variables about the spacecraft or the component selected will be shown here. Note the Zendir category which will display custom variables that have been exposed for spacecraft simulation. All other variables are Unreal values and will be skipped in these tutorials.
5. This is the compiler log. Any issues with compiling blueprints with errors or warnings will appear in this log. This is useful for fixing issues or determining where code is incorrect.
Adding a Component
Components can be added to the spacecraft by pressing the Add Component button in the outliner. The component will be added as a child to the component that is currently selected. There are some options for components, most of which are Unreal-specific objects. For standard shapes and meshes, the static mesh component is sufficient. This is the same component type that is present in all child components for displaying the mesh and material of the object. To add another object from the object library, select the chassis as the parent component and add a Child Actor.
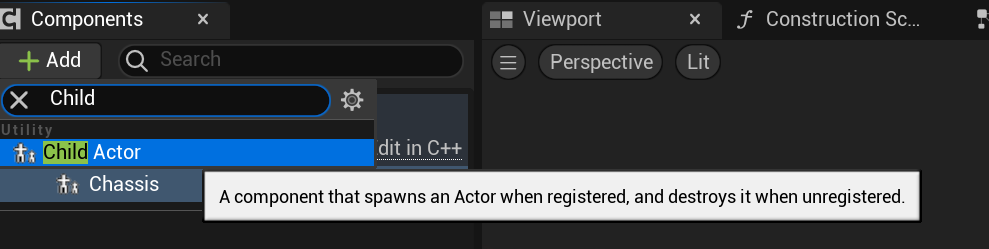
A child actor allows for any created component to be attached to the spacecraft (or object selected). Several pre-configured components can be found in the following directory in the content browser. They have been sorted by category of component type.
Plugins/ZendirAssetsSpace/Blueprints/Components

NOTE
In the file explorer, the
ZendirAssetsSpacefolder is located in the mods directory under theZendirAssetsfolder. This is how Unreal picks up additional files for the content browser. This particular mod includes all space-related assets. TheZendirAssetsGroundfolder includes any ground-related assets. Additional packs may be included in the future.
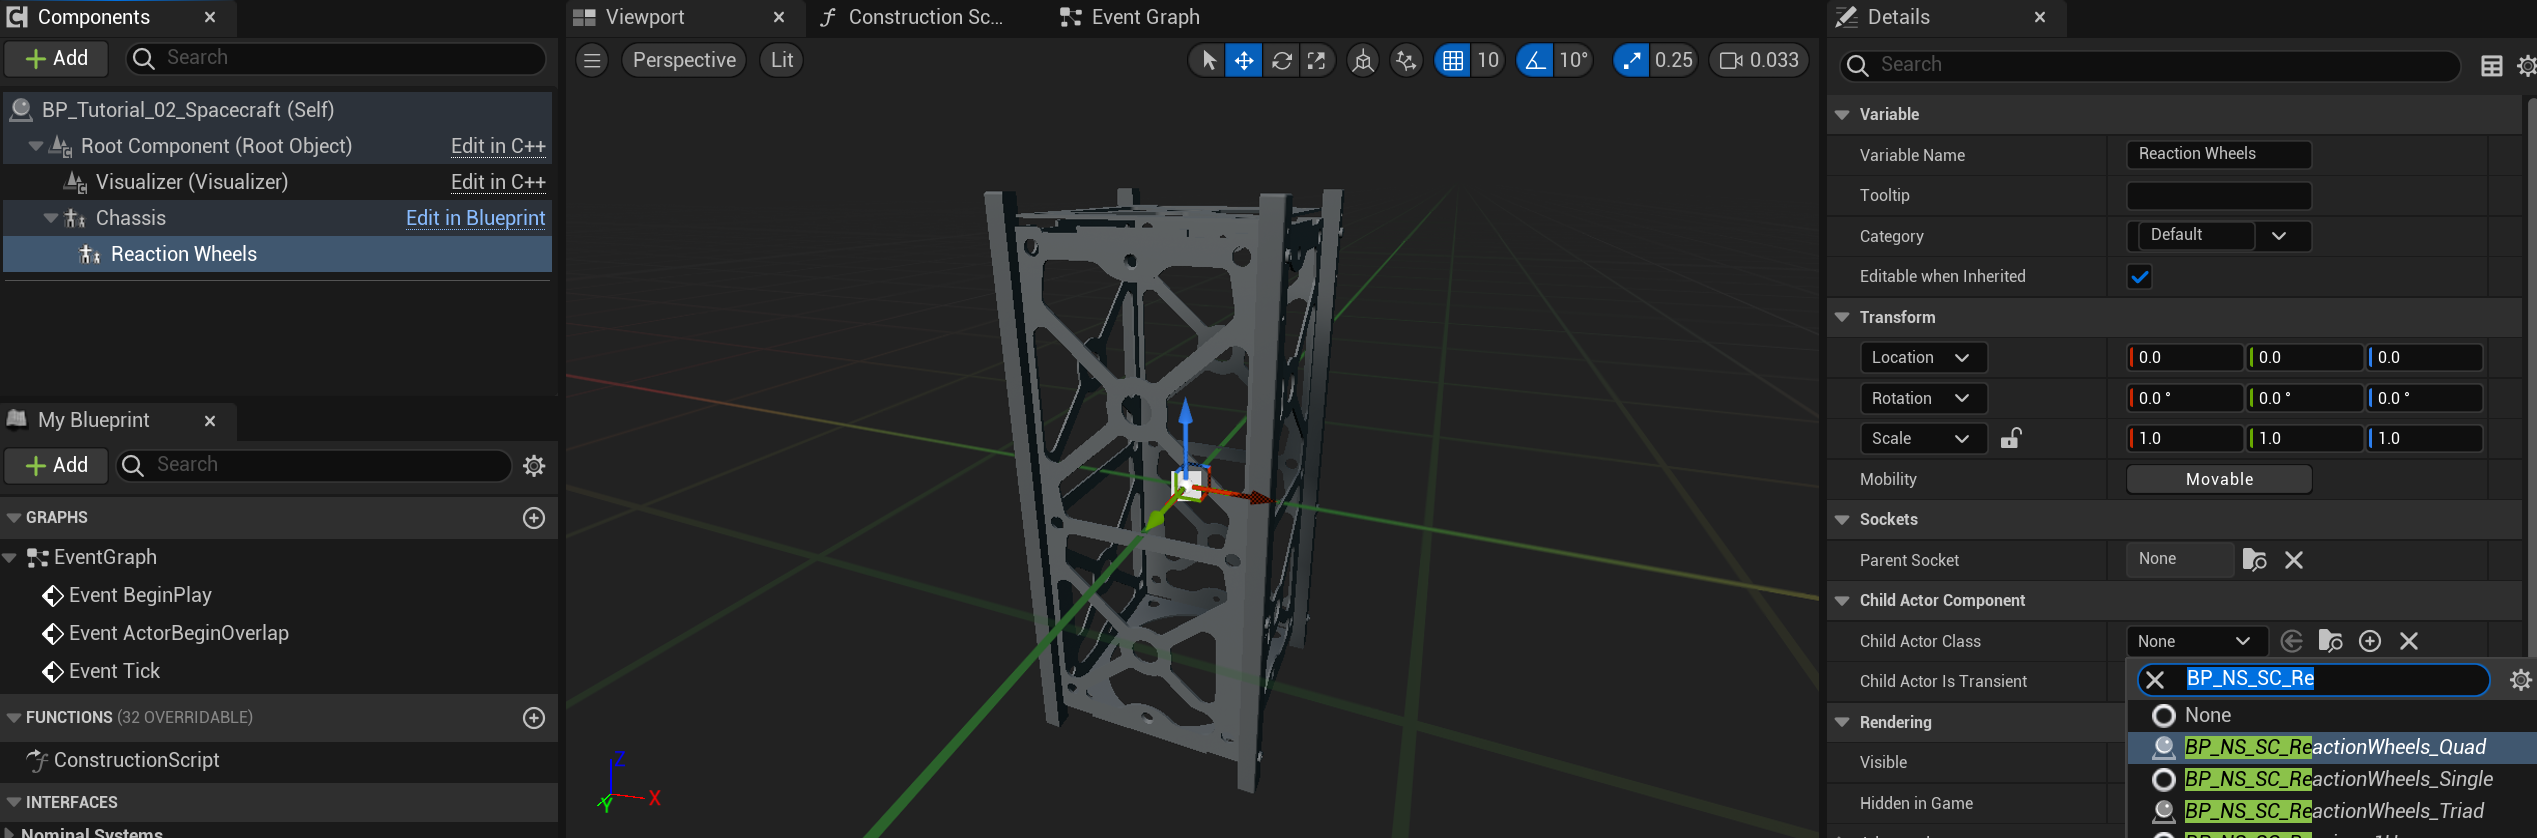
Once a child actor is added, select the child actor navigate to the details panel and change the Child Actor Class to the desired class. This is the object that will be added to the spacecraft.
Adding the Required Components
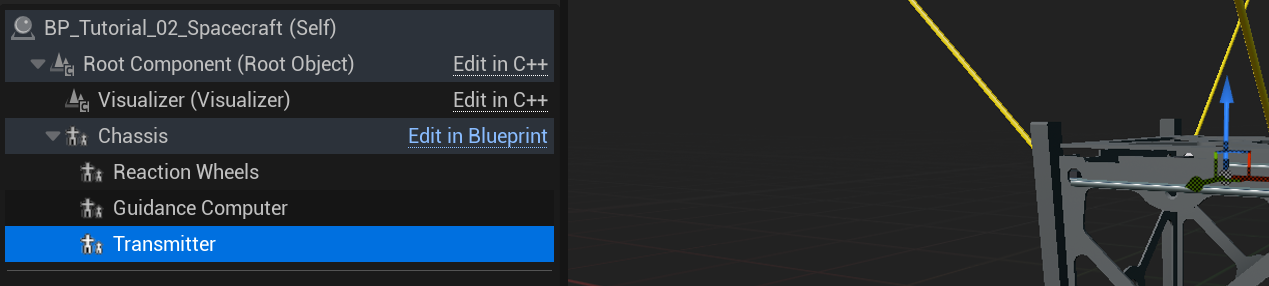
The first component to add is the Reaction Wheels, which will drive the attitude guidance system onboard the spacecraft. This will be the same component as the previous tutorial, using the BP_NS_SC_ReactionWheel_Quad component. With each component, it is good practice to name the component in the components panel.
The next component to add is the Guidance Computer, which will control the software chains and update the reaction wheel commands. This component will be the BP_NS_SC_GuidanceComputer. The final required component, for now, is the radio Transmitter. This will be able to transmit message data over the TT&C system. This component is the BP_NS_SC_Transmitter_1U.
Once the components are added, clicking each of the components will show the transform panel in the details panel. This will show the location, rotation and scale properties relative to the parent. For each component, adjust the location such that the components do not intersect and are displayed correctly on the cube satellite.
NOTE
Unreal uses the left-handed coordinate system, while Zendir’s simulation software uses the right-handed coordinate system. As such, the positions and rotations in the Blueprint editor will be different to the actual units. These will be converted automatically when represented in the simulation.
Updating the Guidance Computer
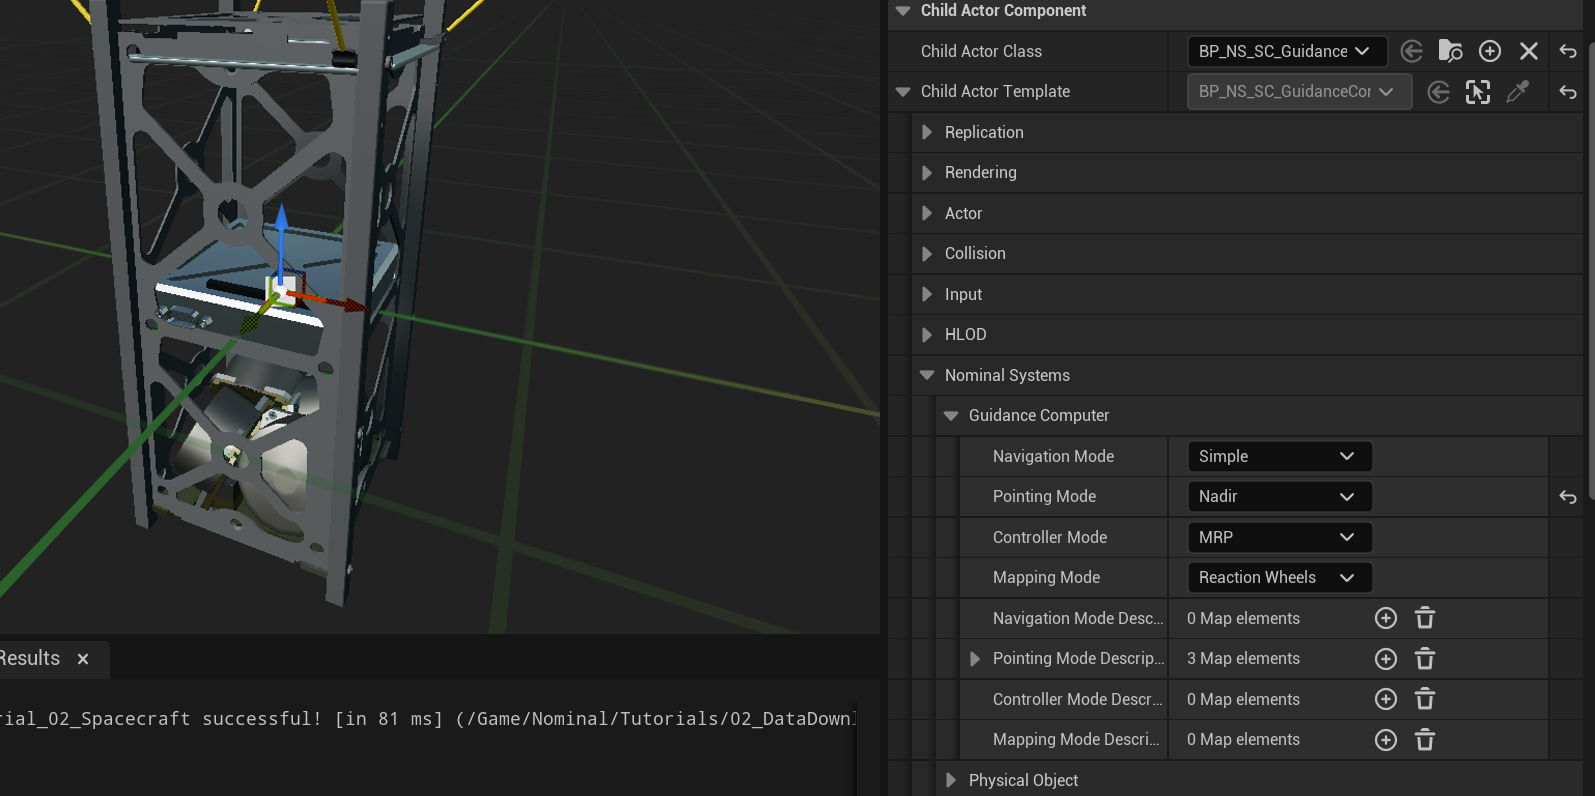
For this tutorial, the Nadir pointing mode will be used on the guidance computer. This will attempt to align the antenna to constantly face towards the center of the Earth. To adjust the initial state of the guidance computer, select the component in the blueprint spacecraft editor and adjust the value under the Child Actor Template | Zendir | Guidance Computer category. Change the pointing to NADIR.
NOTE
Generally, most variables will be located under the
Zendircategory. Variables exposed in the blueprint components may not have a category and will show up under theDefaultcategory.
Updating the Spacecraft Variable
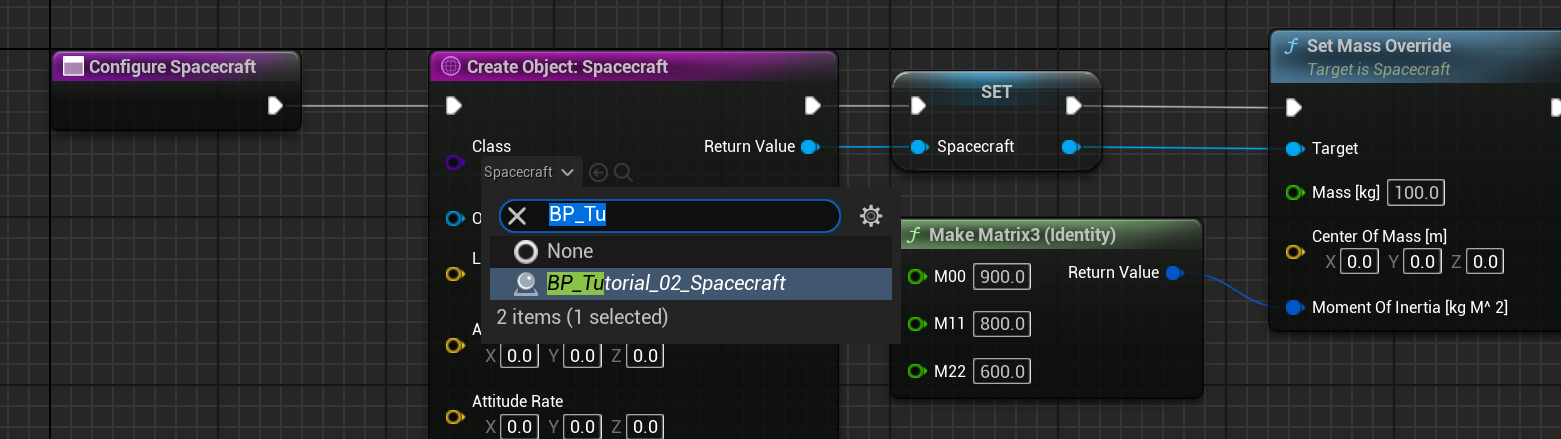
Now that the spacecraft has been designed, returning to the tutorial blueprint, the Create Object node can have a class change. The new class can be selected to BP_Tutorial_02_Spacecraft, as created. Since the original class was Spacecraft, which is inherited from the custom blueprint, this will not break any blueprint nodes.
NOTE
If the spacecraft class does not appear, make sure to hit Compile and Save on the spacecraft Blueprint asset.
If the variable changes types, this will often prompt with a confirm message for changing the variable type. In this case, clicking confirm will change the type without any issues.
WARNING
When changing the object type to a class that inherits from the previous one, there should be very few issues with the blueprint compiling. However, changing to another class may result in blueprint compile errors that may result in needing to change the blueprint nodes. It is best practice to use the lowest level of inheritance when storing variable types, to avoid issues of changing types.
Visualizing the Spacecraft
Running the scenario once the spacecraft has been configured will display the newly configured components onboard the spacecraft.
