Zendir Studio enables component events to be configured, based on data triggers. MQTT flag events can be configured to trigger when a particular property or value is reached. By default, Studio will have events that are triggered when a Spacecraft enters or leaves an Eclipse caused by a planet blocking the sun or when the altitude drops below the surface. However, additional events can be created that are connected to MQTT. This document will explain how to create the events and have the data published over the network.
Configuring the GPS
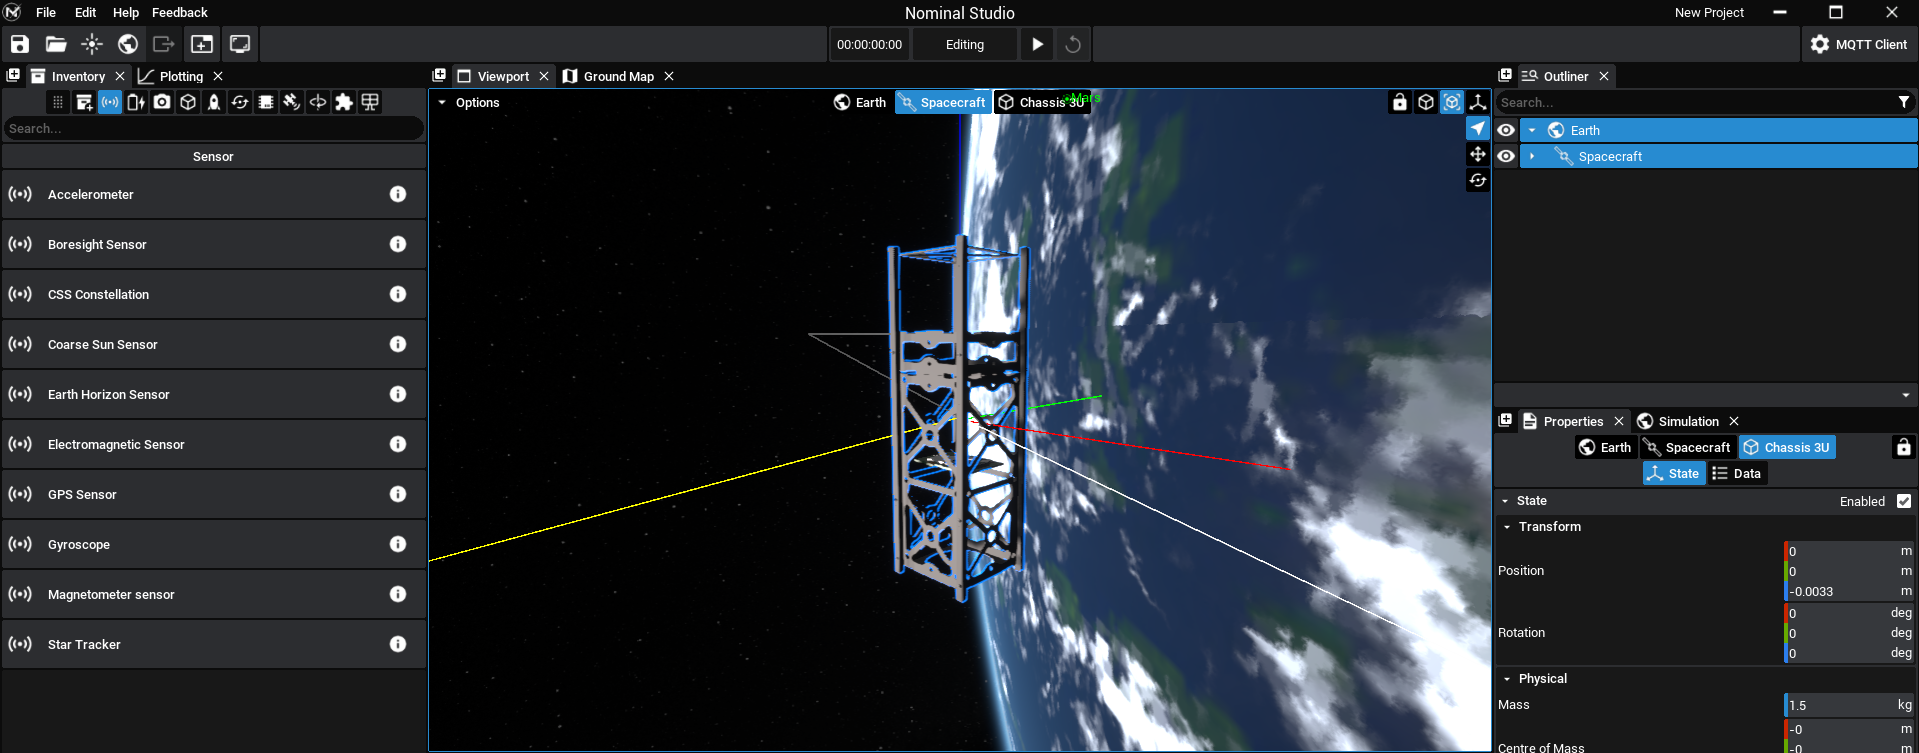
For this tutorial, a GPS event will be triggered when a specific latitude is reached and when a particular longitude is reached. These events will be published over MQTT. To start, a new spacecraft must be added with the GPS Sensor attached. Apart from the default chassis, no other components are required. All components have values that can be triggered by events, however, so this tutorial can be adjusted to work with other parameters.
NOTE
The GPS sensor can be found under the sensor tab. Add the sensor to the chassis at some desired location.
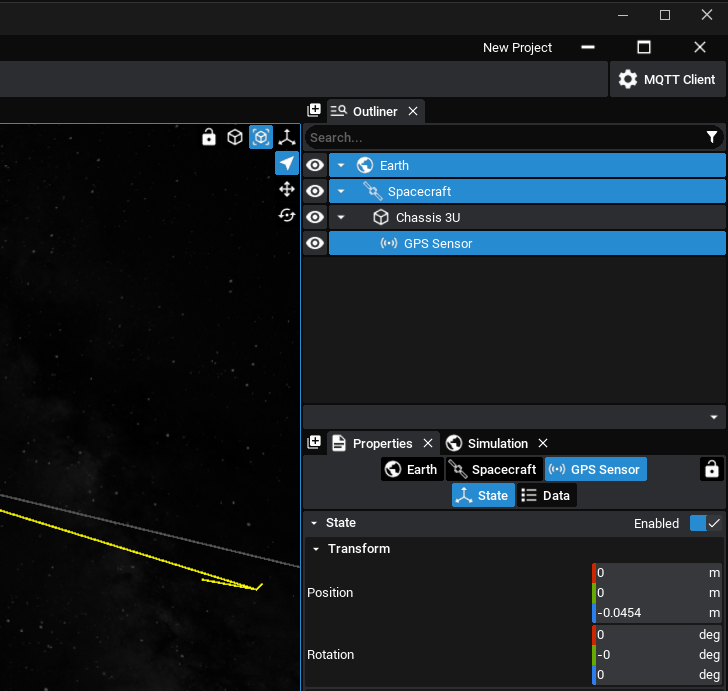
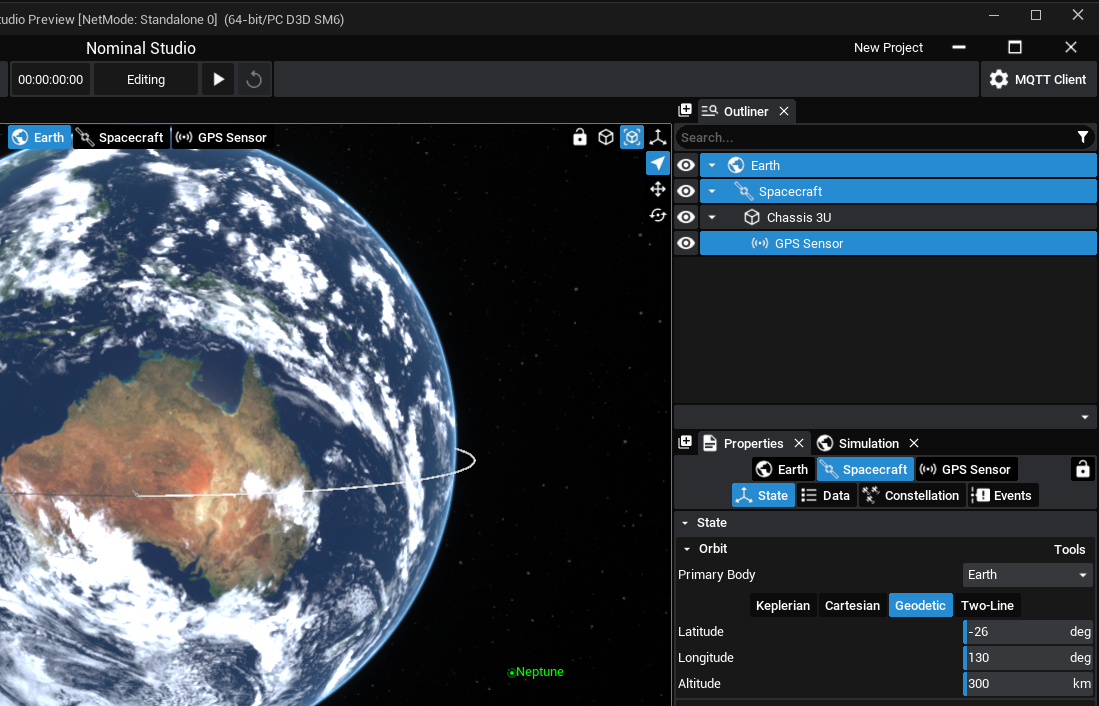
Select the GPS from the hierarchy in the Outliner Panel, by dropping the arrows until the GPS component is found, and the Properties Panel will display the list of information once the component box is selected.
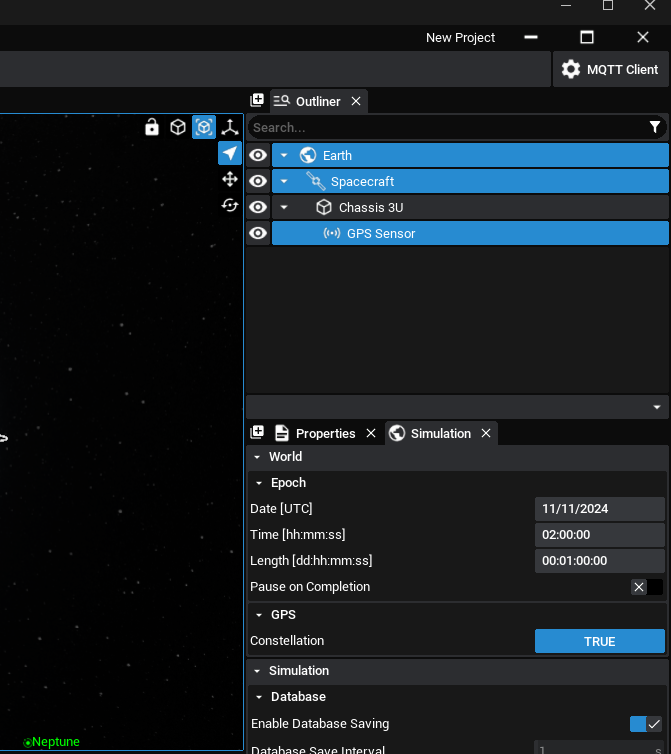
By default, a Global Positioning System will not be initialized in Studio. As the GPS sensor will be used, the GPS constellation will need to be enabled for it to function correctly. Press the Simulation tab, which is to the right of the properties panel by default and set the GPS > Constellation to true.
NOTE
Zendir Studio comes with a pre-built constellation of 32 spacecraft in a standard GPS orbit. These spacecraft will communicate their state to the GPS sensor and simulate the effects and calculations that a realistic constellation will have.
In this example, set the longitude to 130 degrees and the latitude to -26 degrees in the geodetic tab of the spacecraft. To ensure that the latitude changes over time, the inclination of the spacecraft orbit needs to change to a non-zero value. Using the Geodetic initialization will result in the spacecraft being located at this inclination.
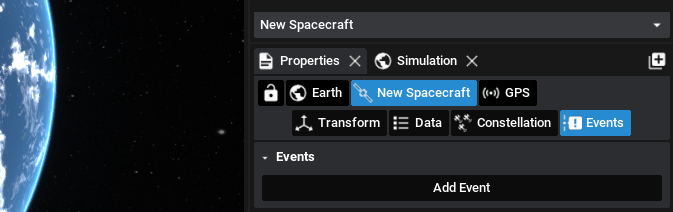
Adding an Event
Select the events tab, which is the fourth button in the properties panel. By default, there will be no events configured and an Add Event button will be present.
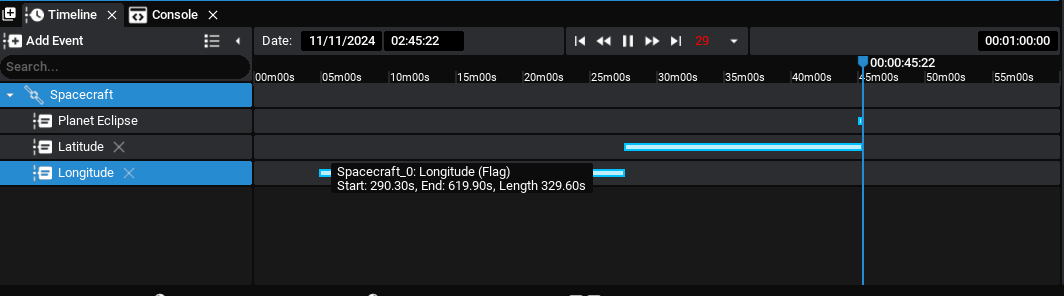
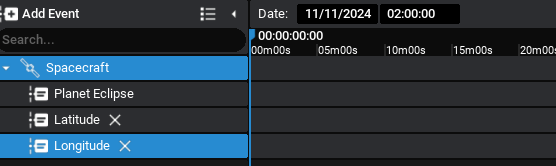
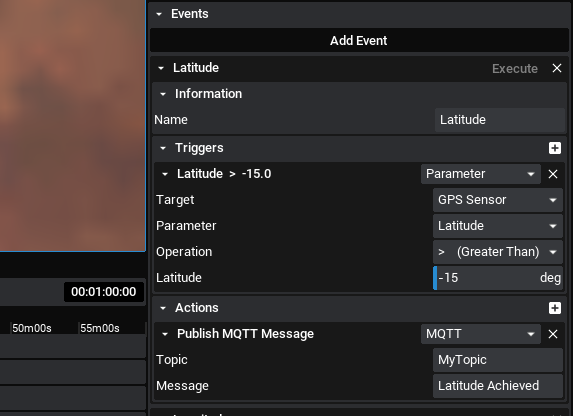
Press Add Event and click the [+] icons on the right of Triggers and Actions. Set the Name to Latitude. The name of the event will also show up on the Timeline.
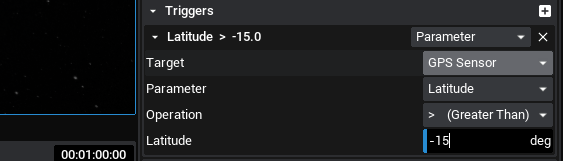
Under Triggers, the latitude on the GPS sensor will be watched. Select Timer and change it to be a Parameter trigger. Set the Target to the GPS Sensor. For the Parameter, set it to the Latitude as that is the value being watched to pass a condition. The operation should be set to > (Grater Than) and a value of -15 should be set for the Latitude. This will cause all the actions defined in the Actions section to trigger when the GPS Sensor’s Latitude is greater than -15 degrees.
Under Actions, select the first drop down which is listed as Method by default, and set it to MQTT. The topic should be set the the topic subscribed in your MQTT broker client, for this demo it is MyTopic. Set the message to Latitude Achieved.
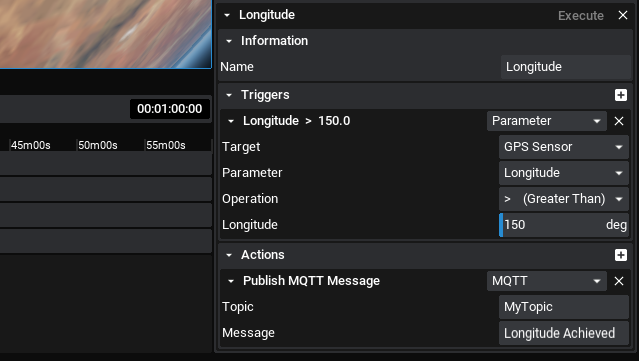
Add a second event with the Name of Longitude and the trigger being Longitude > 150 degrees on the GPS Sensor. Have the same action as the previous event but with the message being Longitude Achieved.
Viewing the Results
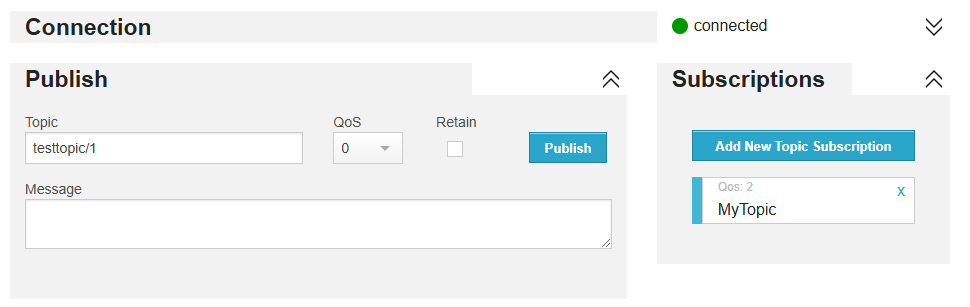
As per the previous tutorial, using HiveMQ, a topic can be subscribed to. This must be the Topic that is defined in the Event panel, which is MyTopic for this tutorial. Copy this topic to the HiveMQ interface and make sure that it is subscribed to.
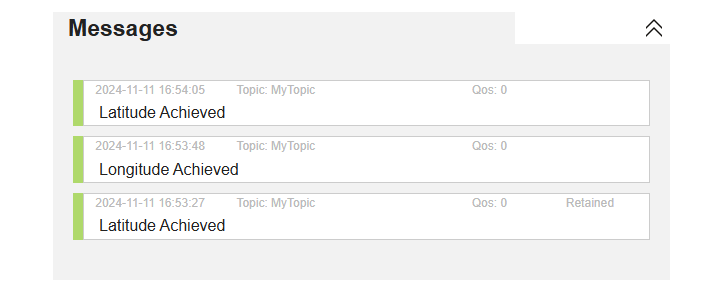
Once ready, hit simulate in Studio and speed up the simulation so the spacecraft propagates around the Earth faster. Once the values are reached, both in latitude and longitude, the events will be triggered and broadcast over MQTT and show the messages that was written in the events panel. Additionaly, MQTT may show the last message retained from previous messages.
Additionally, the timeline will display when the events are triggered (for the duration that the condition is met). For the case of the latitude, when the latitude dips below -15 degrees, the line will stop. Hovering the mouse over the event will display some information about the event and how long it lasted. This can provide additional information about the events and can be used for data analysis.