
The workspace in Zendir Studio is a dock. Panels sit in sections. Each section has a tab bar. You can add panels, stack them as tabs, split them into new sections, tear them into other windows, and resize the gaps between them. Studio stores that arrangement in the project when you save.
The Toolbar Panel, the menus, and the status bar are not dock panels. They stay on the main window.
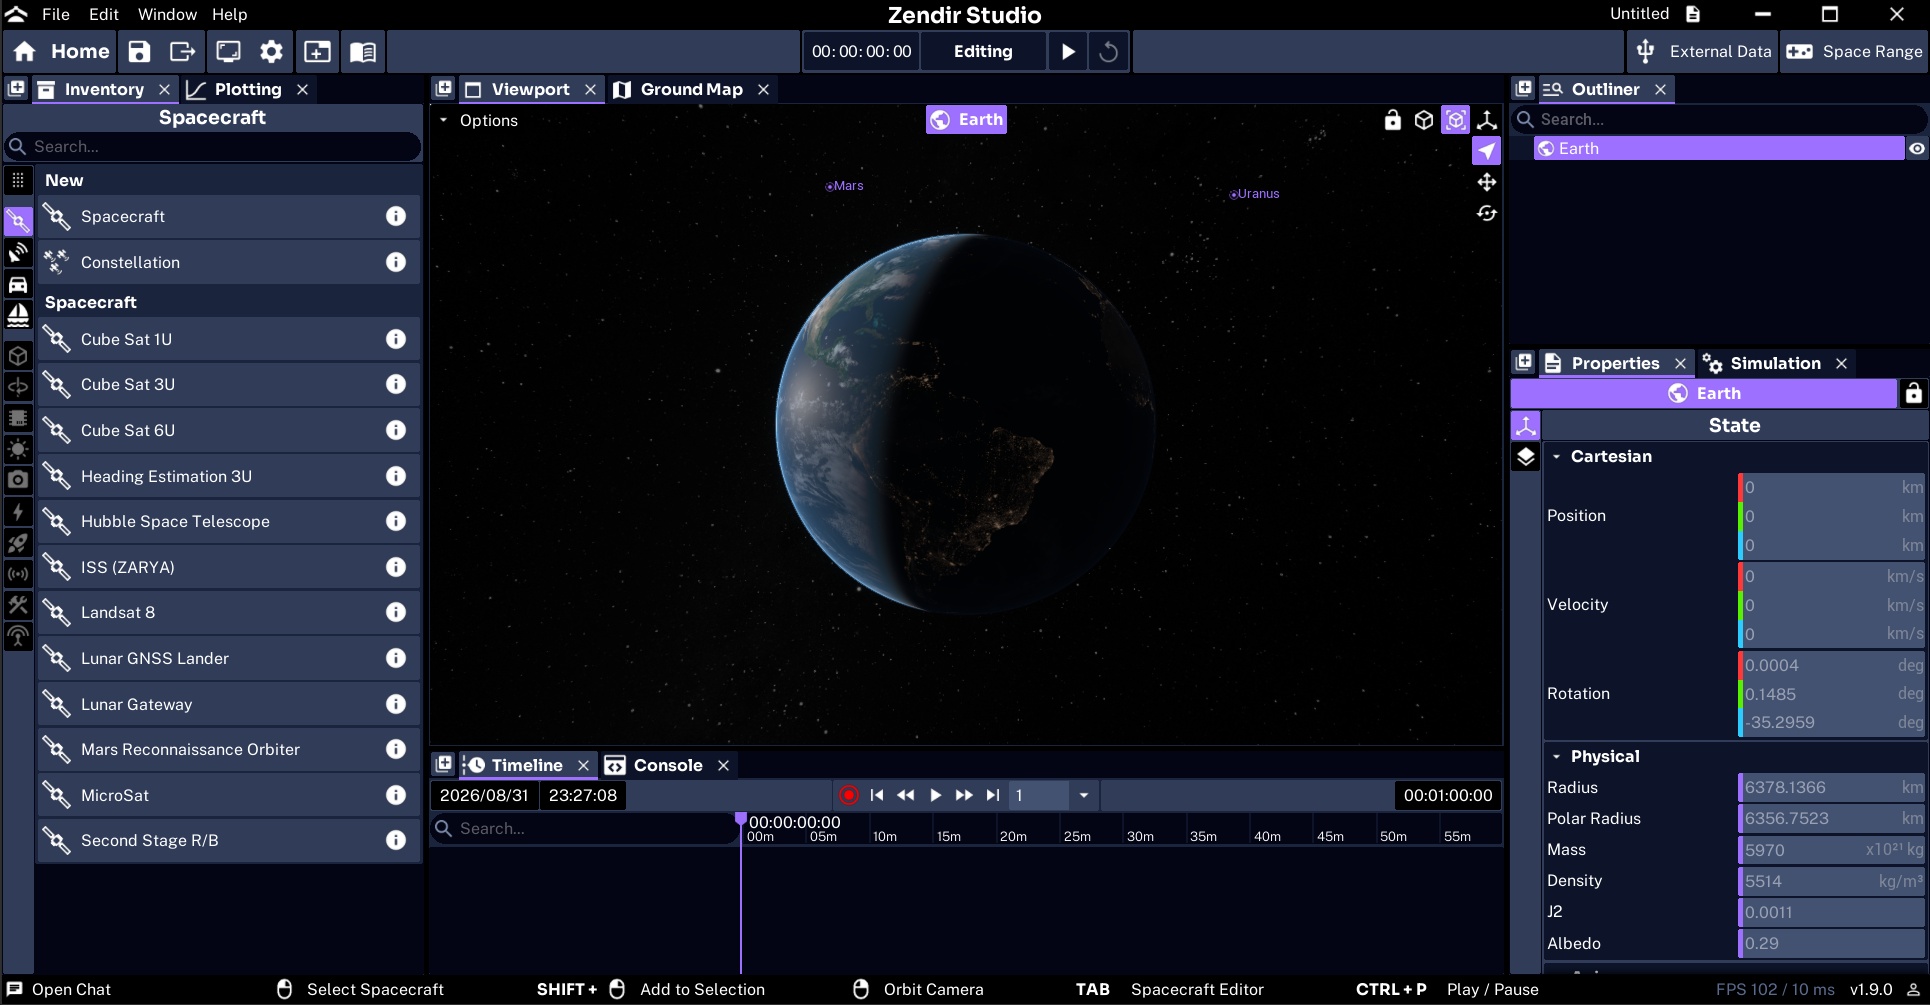
Default Layout
A new file starts with five sections:
| Section | Default panels |
|---|---|
| Left | Inventory Panel and the Plotting Panel as a second tab |
| Center Top | Viewport Panel and the Ground Map Panel as a second tab |
| Center Bottom | Timeline Panel and the Console Panel as a second tab |
| Right Top | Outliner Panel |
| Right Bottom | Properties Panel and the Simulation Panel as a second tab |
The left column is about one fifth of the width. The center column is a little more than half. The right column is about one fifth. In the center, the viewport takes most of the height and the timeline sits below it. In the right column, the outliner is the shorter strip at the top. Those five slots are only the starting arrangement. After you split, merge, or tear panels away, the workspace is whatever you made it. Library examples and saved projects restore the layout they were saved with, not this default.
Plotting is often already open next to the Inventory Panel in examples. You can add it, and other analysis panels, from the + menu in any section.
Adding a Panel
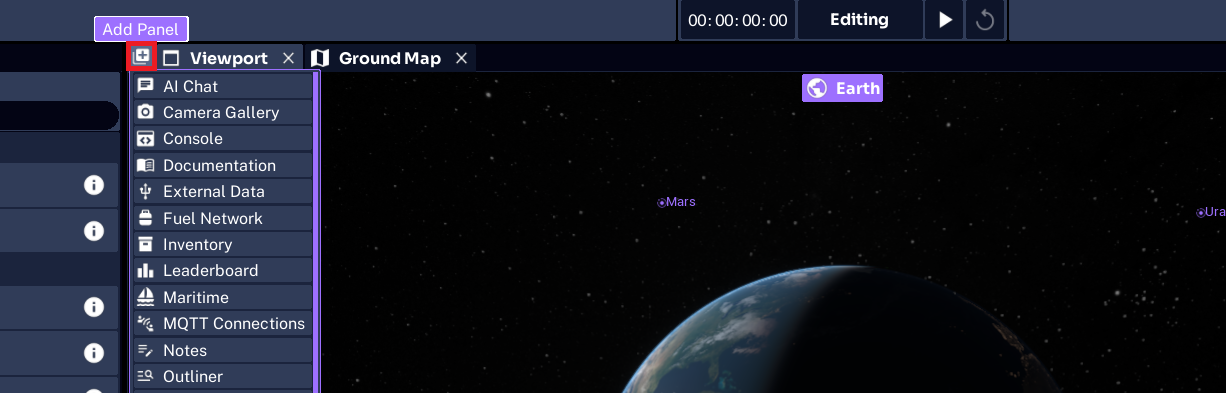
Every section has a + control on the right of its tab bar. Select it to open the panel menu for that section.
Choose a panel from the menu. Studio adds it as a new tab in that section and shows it. You can open the same panel type more than once. A second Viewport Panel is a second independent 3D view.
Typical entries include:
- Viewport, Ground Map
- Inventory, Outliner, Properties, Timeline, Console
- Plotting, Parameters, Network Graph
- Notes, Timer
The + control adds a panel to the section you clicked. To put it somewhere else, add it first, then drag the tab. You can also add it in a new window, as described below.
NOTE
If a type is already a tab in that section, it may be hidden from that section’s menu. Add it from another section, or move an existing tab, instead.
Moving and Merging Panels
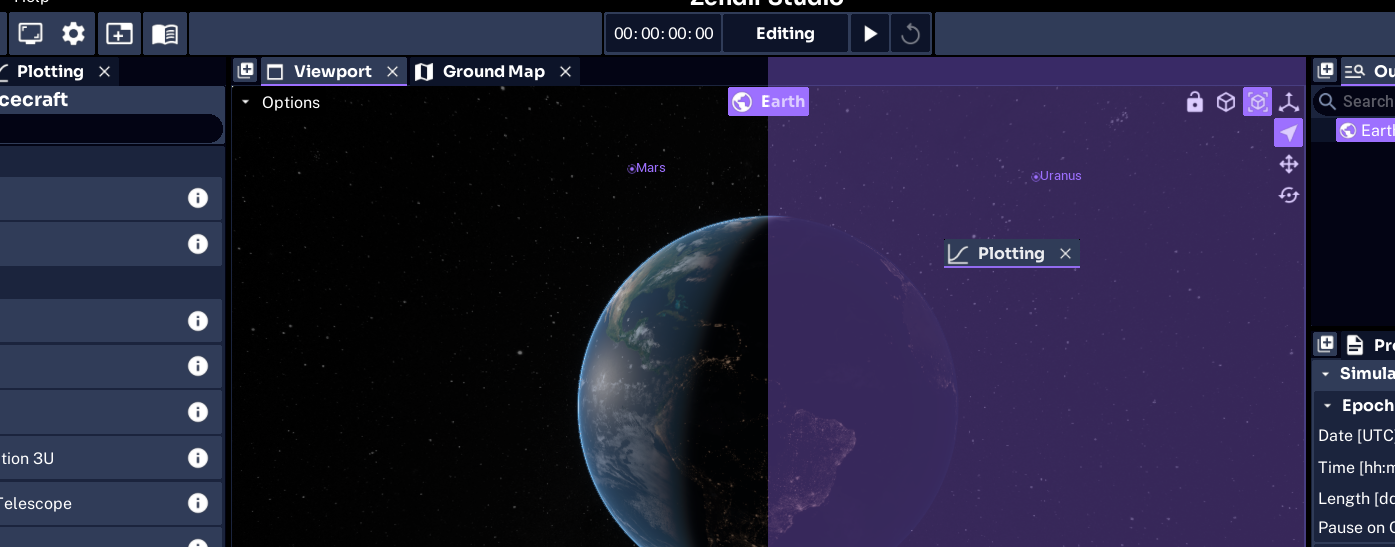
Drag a tab by its title. While you drag, Studio shows a highlight over the drop target. Release to place the panel.
| Drop location | Result |
|---|---|
| Center of a section | Adds the panel as a tab in that section (merge) |
| Left, right, top, or bottom of a section | Splits that section and creates a new neighboring section |
| Outer edge of the whole workspace | Adds a full-height or full-width section along that edge |
| Between two tabs on a tab bar | Inserts the panel at that position in the tab order |
| Empty space outside every section | Tears the panel into its own window |
A thin caret on the tab bar shows the insert point when you are reordering tabs. A large overlay on a section shows a split or merge. A thick bar along the window edge shows an outer dock.
You can drag from the main window into a second Studio window, and back. If you drag the last tab out of a torn-off window, that window closes.
Resizing Sections
Drag the divider between two sections to change their sizes. The handle is the gap between them. It highlights when the pointer is over it. A section that has been dragged down to its tab bar can be opened again by selecting one of its tabs.
The main window always keeps at least one section. You cannot remove the last remaining area on that window.
Closing Panels and Sections
Select the close control on a tab, or middle-click the tab, to close that panel.
Right-click a tab for more close options. Typical actions are:
- Remove Tab: Closes this panel.
- Close Other Tabs: Closes every other tab in this section.
- Close Tabs to Right: Closes tabs to the right of this one.
- Close All Tabs: Closes every tab in this section.

When a section has no tabs left, it shows Remove Section in the empty area. Select that to drop the section and give its space to its neighbors. Closing the last tab in a torn-off window closes the window instead.
Opening Other Windows
There are two kinds of extra window.
Dock windows can hold the same panels as the main workspace. Create one in either of these ways:
- Drag a tab onto the desktop, or onto empty space outside every section. Studio opens a new window with that panel.
- Right-click a tab and select Pop Out.
- Select New Window on the Toolbar Panel. The new window starts empty. Use
+on its tab bar to add panels, then drag tabs in from the main workspace if you want.
A torn-off window starts as a single section. You can split it, add tabs, and treat it like a smaller copy of the main dock.
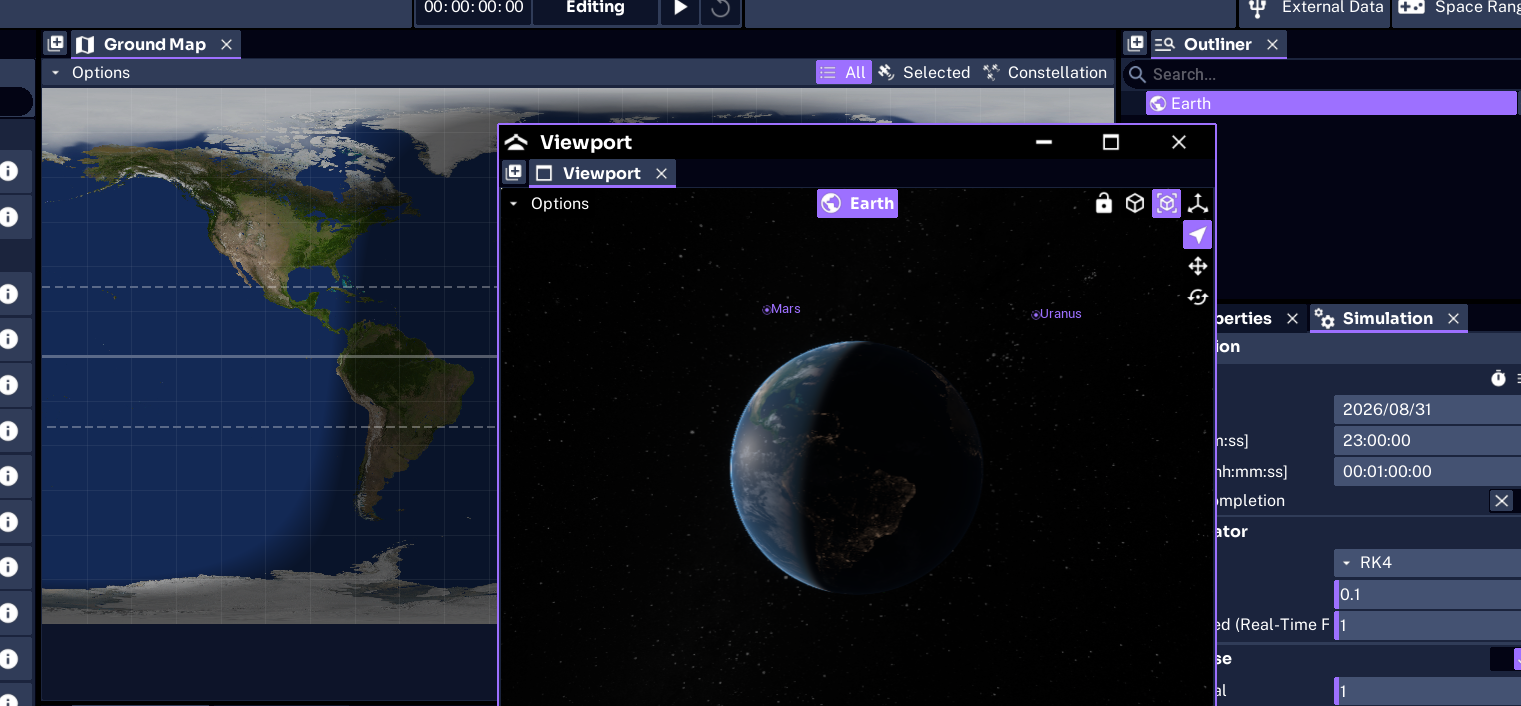
Content windows are separate tools. Preferences, External Data, and Space Range open this way. They will open up a new window with the content and additional panels can be added to those windows.
Using Fullscreen on a Panel
Right-click a tab and select Fullscreen to hide every other section in that window and show only that panel. The underlying layout is unchanged. Closing fullscreen, adding a tab, or moving a tab restores the previous arrangement.
Fullscreen is a view state only. It is not written to the save file. After you reload the project, the saved split layout returns, not the fullscreen presentation.
Saving the Layout
Select save on the Toolbar Panel, or use File → Save. The project stores:
- Which panels are open, including duplicates
- Which tab is active in each section
- How sections are split and their relative sizes
- Each panel’s own state (for example, Viewport targets and options, plot configuration, notes)
- Extra dock windows, including their size and position on the display
When you open the project again, Studio rebuilds that workspace instead of the default five-section layout. Exporting to a .zen file includes the same layout, so a colleague who imports the file gets the same panels.
If a saved panel type cannot be created (for example after a version change), Studio skips that panel and keeps the rest of the layout.
NOTE
Layout changes count as unsaved work. Return to the Home Screen or quit without saving, and Studio will prompt you. Preferences, External Data, and Space Range windows are not part of this save.
For where projects live on disk and what else a save contains, see Save Files.